How to Do a Baby Freeze
Breaking is all about creativity and self-expression, with every dancer possessing their own variations. But before you can plumb the depths of breaking, you must learn the basics, including the backspin, 6-step, and baby freeze.
Learning how to breakdance means the baby freeze will be among the first moves you learn because it’s designed to be beginner-friendly.
Taking the time to master this freeze is one of the keys to longevity in breaking because you’ll learn the strength, control, and art needed to excel as a b-boy or b-girl.
What is a Freeze?
Making it as a breakdancer isn’t easy. According to the U.S. Bureau of Labor Statistics, fewer than 9,000 professional dancers make a living nationwide. Most dancers perform part-time or recreationally.
But breaking is relatively easy to get into using the perfect practice formula. One of the first things you’ll learn is how to perform a freeze. Freezes are dynamic and visually striking to demonstrate balance, control, and strength, with many of the more advanced freezes seeming to defy creativity.
They’re there to emphasize certain moments in a routine or match the beats of the music. Despite their seeming simplicity, they require immense skill and control over one’s body to achieve.
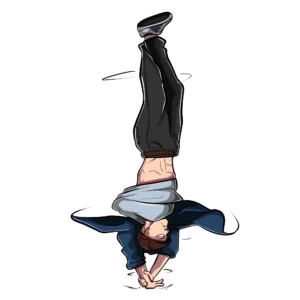
What is a Baby Freeze?
Before you can begin with the more advanced freezes, you must first master your foundation. This includes becoming adept at some of the most basic freezes that come as part of breaking, alongside transitioning into and out of them.
Most teachers begin with the baby freeze since it’s viewed as a foundational breakdancing move that introduces beginners to balance and control alongside raw strength.
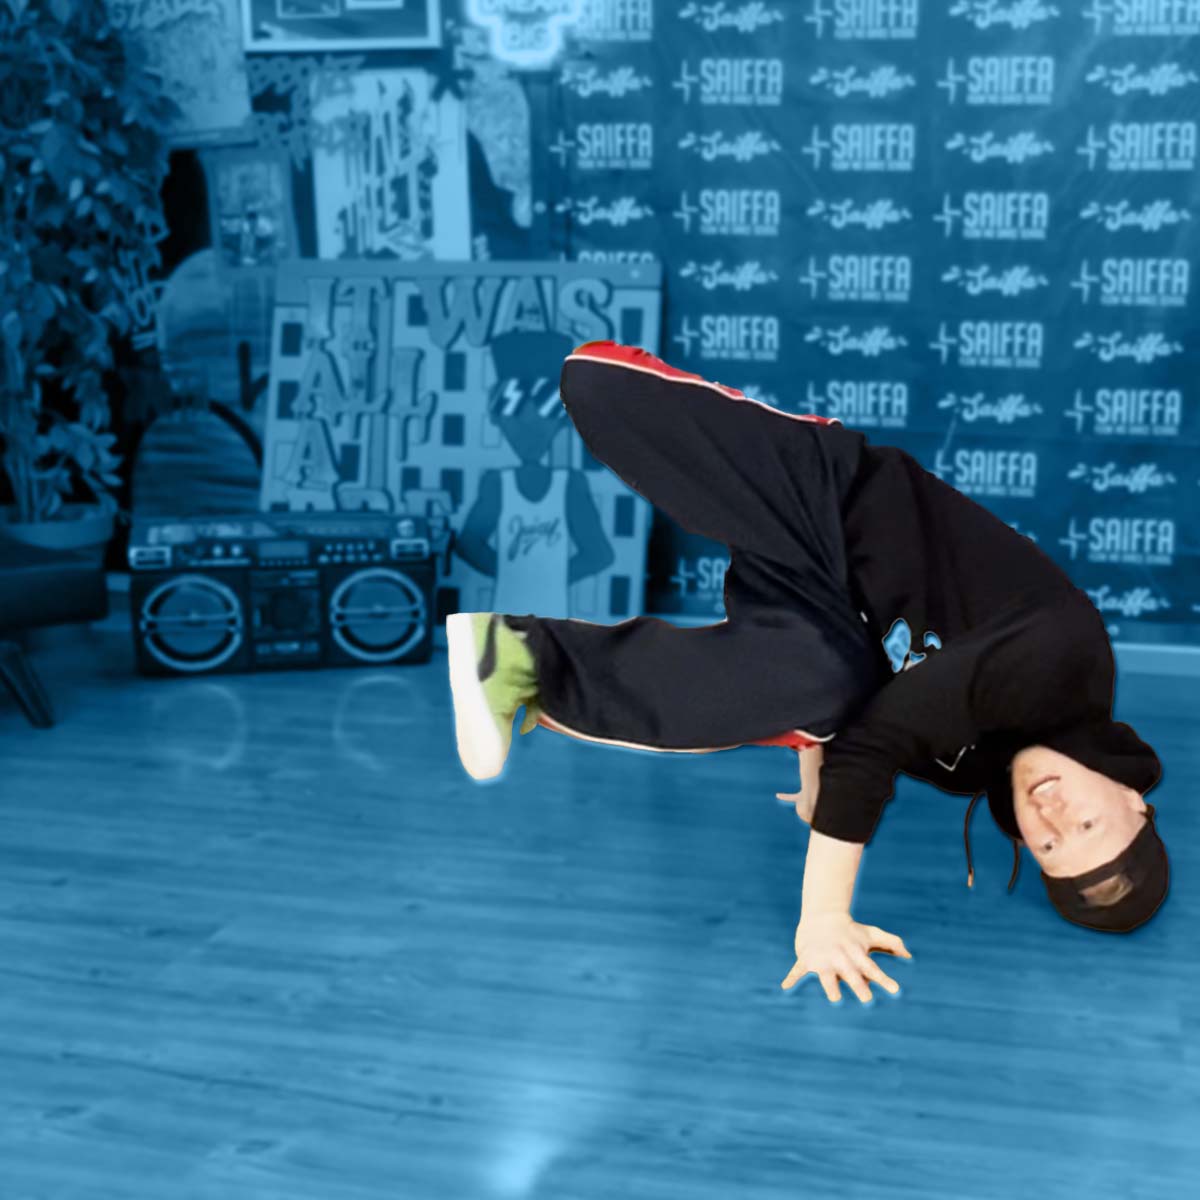
It’s a visually distinctive pose requiring you to balance on one hand while using your arm and knee to create a stylized position. Of course, like most freezes, it can be adapted to incorporate your unique style into the move.
Some of the variations you may see at the Paris 2024 Olympics include:
- Hand positioning
- Leg angle
- Overall aesthetic
Here’s a look at what this freeze should look like to level up your breaking skills:
https://www.youtube.com/watch?v=54mtZoBuRNY&pp=ygULYmFieSBmcmVlemU%3D
Step-by-Step Guide to Performing the Baby Freeze
Beginners often think about the creation of the backspin or how to do a headspin, but breaking requires constructing the foundations for safe dancing first. And this freeze is part of doing just that.
Follow these steps to get the perfect b-boy form while performing your first baby freeze.
Step One – Warmup and Preparation
Injuries are easy to accumulate if you don’t prepare properly. Approximately 80% of dancers experienced one injury per year that impacted their ability to perform.
Start by warming up your body with some light cardio and dynamic stretching. Pay special attention to your core, legs, wrists, and shoulders.
Practice this freeze on a dance mat or other soft surface. Never attempt this freeze on concrete as a beginner without proper protection, such as a hat. Friction burn is a real thing!
Step Two – Enter the Starting Position
The starting position for a baby freeze is kneeling. Don’t worry about styles of footwork or transitions at this stage. Focus on performing the move methodically first.
Use your dominant hand to support your weight and spread your fingers to improve your stability. Your hands should be slightly forward and to the side. Likewise, aim for slightly wider than shoulder-width apart. Ensure that your dominant hand is gripping the ground.
Step Three – Shift Your Weight
Stay in your current position and practice shifting your weight onto the hand you’re using for support. Engage and flex your core muscles, as these will be key to stabilizing your body while you practice at home.
Now, practice lifting one leg and bringing it toward your dominant side elbow. Rest your knee on the back of your elbow. Ideally, your knee should be as close to your armpit as possible, whereas your thigh should be tucked snugly into your torso.
Your other arm can either be used for balance or styling. Although the top 10 b-boys prefer styling, beginners should focus on using it for balance, so stretch it out.
Step Four – Lift and Balance
The next step is the most complex part of the move. Extend your free leg straight out while using your supporting hand for balance. All of your weight should be shifted onto your supporting arm.
One top tip for balance is to lean slightly to the side where your dominant hand is. The strength should come from your core, while your hand is used for balance and keeping yourself stable.
Simultaneously, your head should be neutral, looking forward or slightly to the sky. Don’t look at the ground; this will throw you off balance. In other words, use the same principle as your b-boy stance.
Step Five – Making Progress
Like skills such as how to do a flare, the goal at this stage is to find the ideal balancing point. This is different for everyone and something you’ll have to “feel” through practice and experience.
Practice the baby freeze and try to hold the position for longer and longer. This will build up your strength and enable you to find your balance point without thinking, supporting your transitions as you grow.
What if you are having trouble making the process you expect?
Breaking isn’t about focusing on a single move and hoping you eventually master it. It’s about chaining top rock, down rock, and power moves together, so don’t be afraid to intersperse your practice sessions with other moves.
Every time you progress, your bodily control, stability, and knowledge of yourself increase, which transfers to every breaking move, including the baby freeze.
Conclusion
Are you learning to break for the first time? Don’t get bogged down in the little details like the top three shoes for breaking. This art is about self-expression and creativity, meaning the most important thing is to have fun.
At the B-Boy & B-Girl Dojo, we teach aspiring breakers the moves that’ll take their dancing to the next level. To learn how to windmill and perform other freezes, contact us about our courses now.